Getting Started
SessionCloud portal is the management platform for our softphones. It allows you to configure the softphones for your company employees or customers with all PBX settings and any custom branding allowed by your subscription plan. The advantage of this is that users can use the softphones with zero configuration issues. This reduces support queries and improves user productivity.

When you first login to your SessionCloud account, tap the ‘Create Project’ button in the main view.
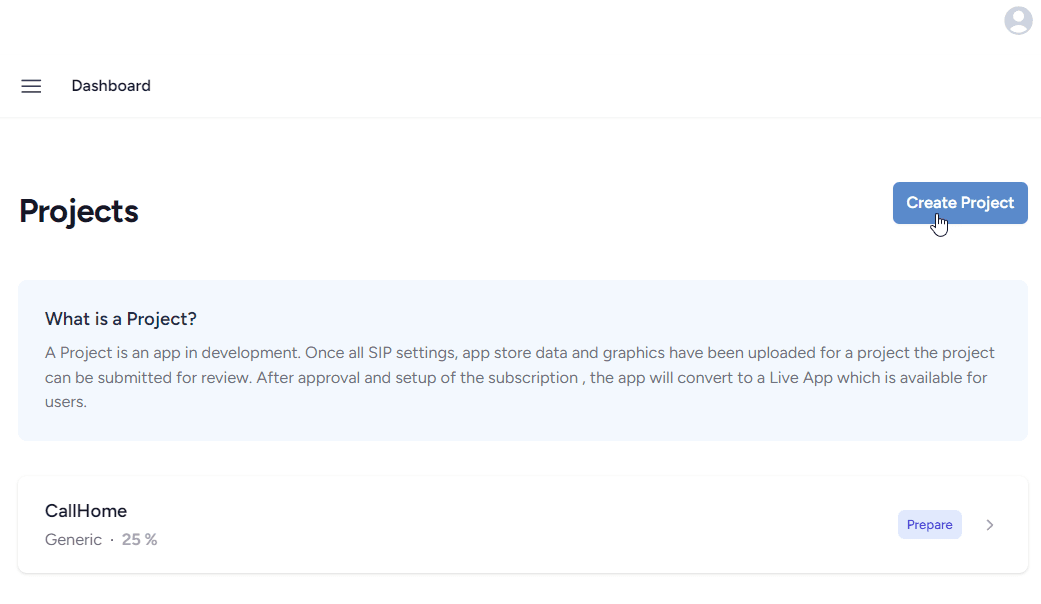
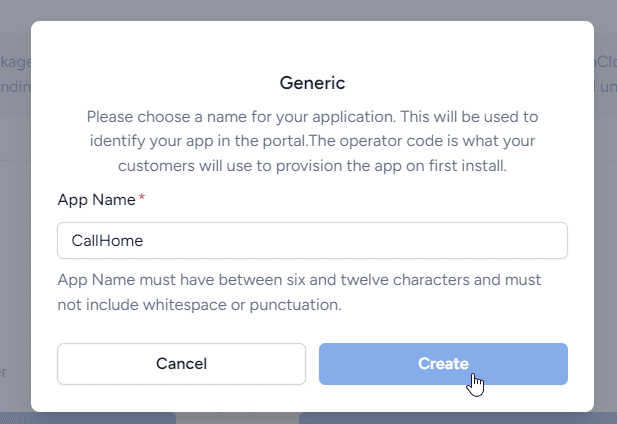
Select a plan and then choose a name for your project, please note this cannot be changed later and will be used to identify your project throughout the portal. The main project view will show the newly created project. All projects will be listed here together with the status. To start customising select the section you wish to edit.
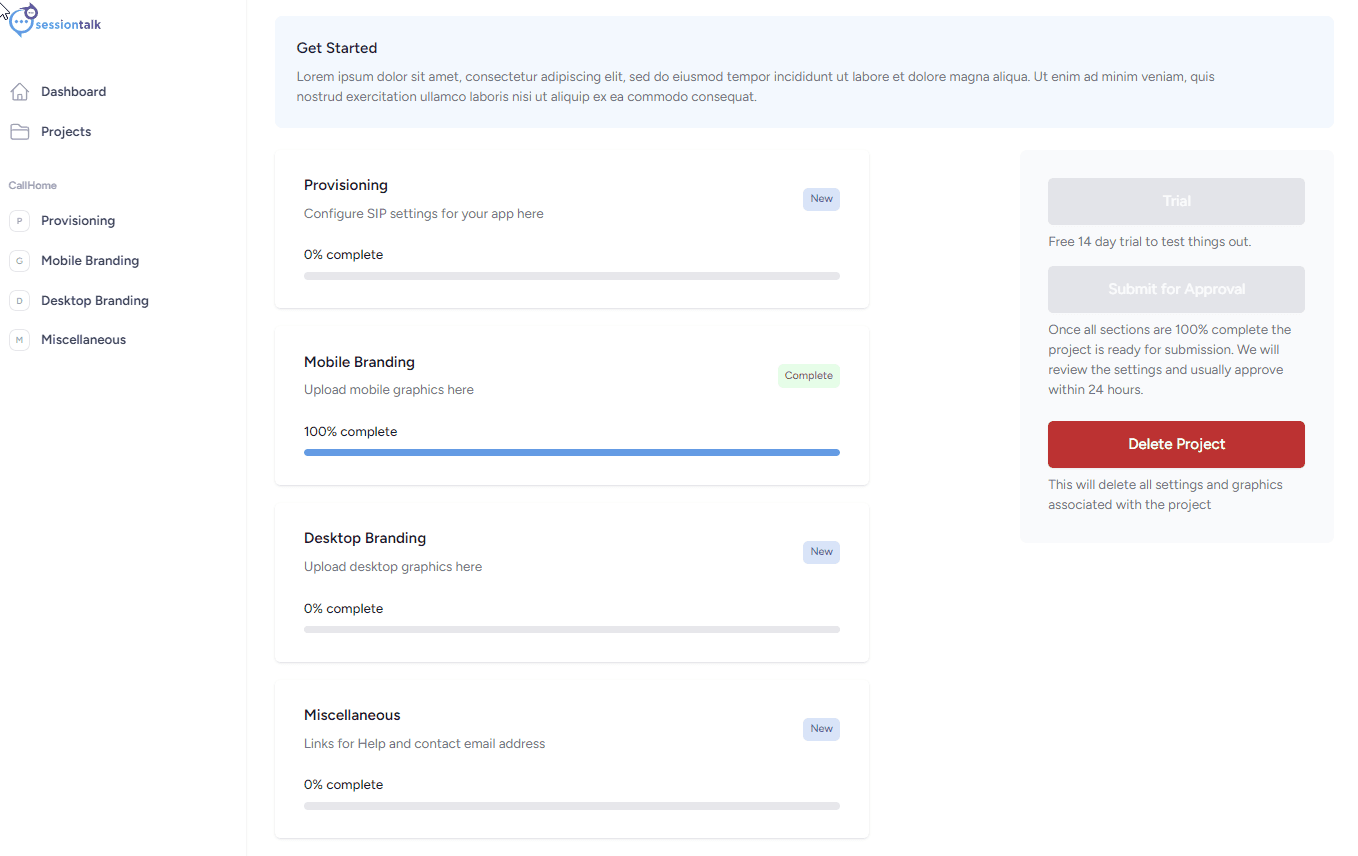
In the Project detail view there are a list of categories. Depending on which Plan was selected this category view will differ. Below we have shown the view for a full whitelabel app. Note that there are categories for the additional graphics required as well as details required for App Store submission This is not required in some of the other plans. Tapping a section will allow you to fill in the details required to create your app.
Provisioning
This is where all SIP settings related to your application can be specified. The settings are currently split between the two tabs. Only the Provider Name and Domain field is required, the other settings may be left at defaults in order to complete this section but typically in most cases the defaults will not be the optimum and it is best to check all the settings and set them as required for your VoIP service. The Operator code field is not required for Whitelabel apps. For the Generic product the operator code is used to provision the settings on first time use of the app. See the provisioning section for further details on each of the fields.
App Store
This section is visible with the Whitelabel product and contains your app’s name, identifier and platform release settings. For automatic iOS signing, add your App Store Connect API key; SessionCloud generates the certificates and profiles, so you do not upload those files yourself. Start with the App Store essential fields, then follow the guide for your platform.
Mobile and desktop branding
Open Mobile Branding, Desktop Branding, or the combined Branding page for your project. Upload a PNG using the dimensions shown beside the upload field. Required smaller sizes are generated from your master image.
The Dialer preview shows your uploaded logo in Light mode and Dark mode side by side. Check the logo’s size, text and contrast against both backgrounds. Transparent parts of a PNG show the dialer background, so artwork that looks clear on white may be hard to see in dark mode.
- Upload a replacement to refresh both previews after the upload succeeds.
- On the combined Whitelabel mobile graphics page, use Platform to inspect the Android and iOS artwork separately.
- On a narrow browser window, the two previews appear one above the other.
The mobile dialer preview reflects the current app’s 20% logo opacity above the keypad. The desktop preview shows the logo in the navigation bar. These are layout previews using default app colours; the exact appearance varies by device and app version.
If the default logo does not look right on a dark background, use Dark-mode logo (optional) to upload a separate PNG up to 500KB. Only the dark preview changes. Choose Use default logo to remove the override and use your normal logo in both themes. App versions with dark-logo support use this override; older versions continue to use the default logo.
Uploading and previewing a logo does not replace your project’s normal publishing or app-build steps. Follow the project’s status and publishing controls when the artwork is ready.
Miscellaneous
Here you can specify a general color scheme and help titles and corresponding links.
Moving to Live Status
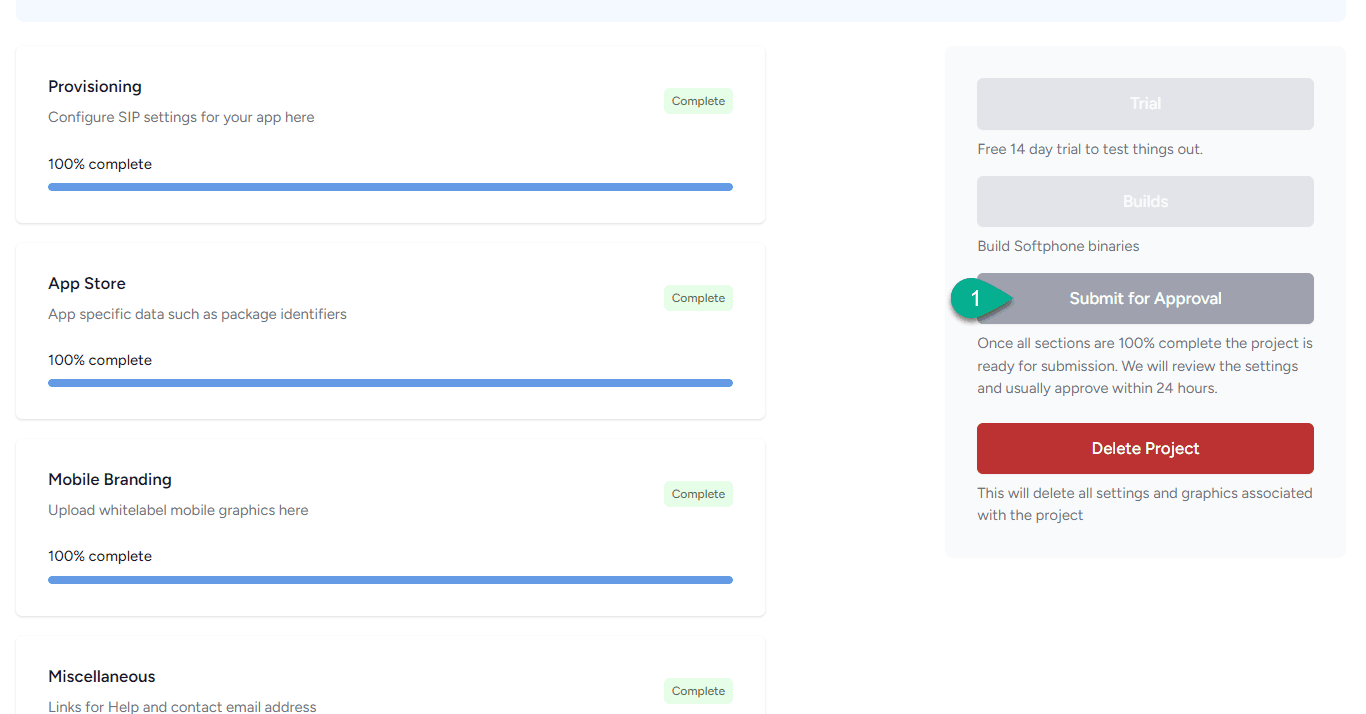
Once all sections are 100% complete, tap the ‘Submit for Approval’ button in the Project Detail View. Usually projects will be approved within 24 hours after submission. In the case of ‘Generic Apps’ the live app will be available immediately for users on iTunes and GooglePlay. Users will need to enter the Provider Id provided by you in order to provision the settings. For Whitelabel apps product binaries will be available for download from the Builds section.