iOS App Store Settings
Open your whitelabel project in the portal and select App Store → iOS. Use Apple Signing (automatic) to generate the distribution certificate and App Store provisioning profiles for your app.
Apple Signing (automatic)
1. Create a team API key in App Store Connect
Use the Apple Developer account that will publish your app. Ask its Account Holder or an Admin to complete these steps:
- Sign in to App Store Connect .
- Open Users and Access → Integrations → App Store Connect API → Team Keys.
- If Request Access appears, the Account Holder must request API access first. Continue once Apple approves it.
- Click Generate API Key, or + if keys already exist. Give it a recognisable name, such as
My Company Portal Signing. - Choose Admin under Access for this certificate and provisioning-profile workflow, then click Generate.
- Download the API key and keep the
.p8file securely. Apple only allows the private key to be downloaded once.
Use a team key for this portal form. Team keys apply across the Apple account’s apps; they cannot be restricted to just this project. See Apple’s API key setup guide .
2. Fill in the portal fields
Return to App Store → iOS → Apple Signing (automatic) in your project.
| Portal field | What to enter |
|---|---|
| Issuer ID | Copy the Issuer ID displayed in the App Store Connect Team Keys section. This is the long identifier containing hyphens, not your Apple Developer Team ID. |
| Key ID | Copy the Key ID shown for the team key you generated. Use the ID, not the descriptive name you gave the key. |
| API Key (.p8) | Select the private key file downloaded for that same Key ID, normally named AuthKey_KEYID.p8. Upload the file itself. |
All three values must belong to the same Apple team key. An APNs push-notification key is a different credential and does not replace this App Store Connect key.
3. Save and generate signing assets
Before generating, save your project’s App Identifier in the App Store settings. This is the bundle identifier for your app, for example com.example.softphone; for an existing app, use its existing identifier.
- Click Save Apple API Key and wait for Apple API key saved.
- Click Generate signing assets. This button becomes available after a key has been saved.
- Wait for the completion message and check that the certificate status shows Valid.
- Reload the App Store page to see the generated certificate and profile fields before making further changes or building.
The portal creates the distribution certificate, its .p12 file and password, and App Store provisioning profiles for the app and messaging extension. It saves the certificate identity, profile names, UUIDs and files to your project. You do not need to export these from Keychain Access or fill in the manual signing fields below when using automatic signing.
Generating signing assets does not submit your app to Apple for review. Continue with your project’s build and App Store submission steps.
Renewal and troubleshooting
- Generate signing assets is disabled: save all three API key fields first. The project must also be editable.
- Authentication or permission error: check that the Issuer ID, Key ID and
.p8match, that the key is active, and that it has Admin access. - App Identifier is not set: save the bundle identifier in the project’s App Store settings, then retry.
- Bundle ID permission error: check access in the Apple account. If instructed by the portal, register the identifier in Apple Developer before retrying.
- Lost
.p8file: create a replacement team key and save its new details in the portal. - Certificate approaching expiry: use Renew to replace the saved certificate and profiles. Renewal revokes the previous project certificate; coordinate with anyone else using it for builds.
Avoid repeatedly generating certificates. If Apple’s certificate limit is reached, the current generator can revoke the oldest matching distribution certificate to make room. Contact support before generating if the Apple account’s certificates are shared with other build systems.
iOS version
Set the version of your application to be displayed on the App Store whenever you create a new iOS release.
Manual signing alternative
Use the following fields only when supplying your own certificate and profiles. See Creating Certificates and Profiles for the App Store for the manual setup.
Dummy data is used in all screenshots below and is intended only as a guide as to how the information should appear.
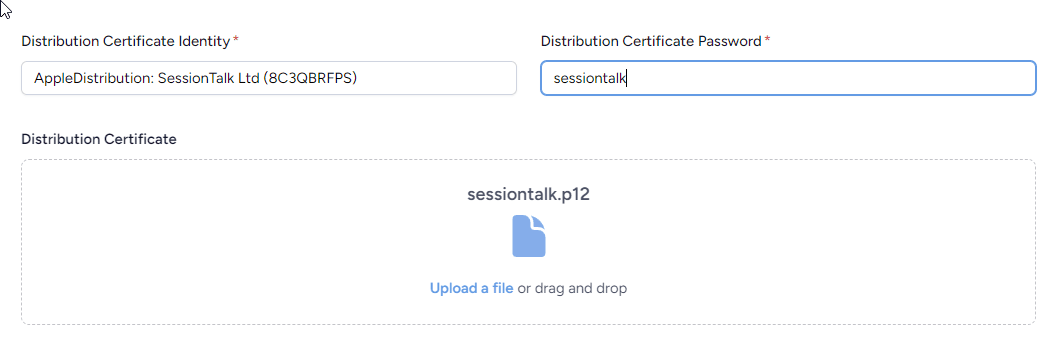
Distribution Certificate Identity
This is the Common Name of the Apple Distribution certificate you created in your Apple Developer account as described in this help article. You can obtain this by double clicking the certificate in the Keychain Access application on your Mac.
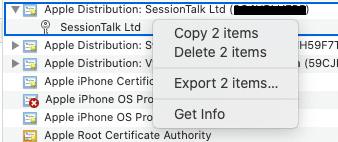
Distribution Certificate Password
This is the password you set on the certificate when exporting certificate and private key pair. This can be done by selecting both the certificate and private key in the KeyChain Access application on your Mac, then right click and ‘Export 2 items’. Save the certificate in p12 format.
Distribution Certificate
This is the actual certificate uploaded to your portal in p12 format.
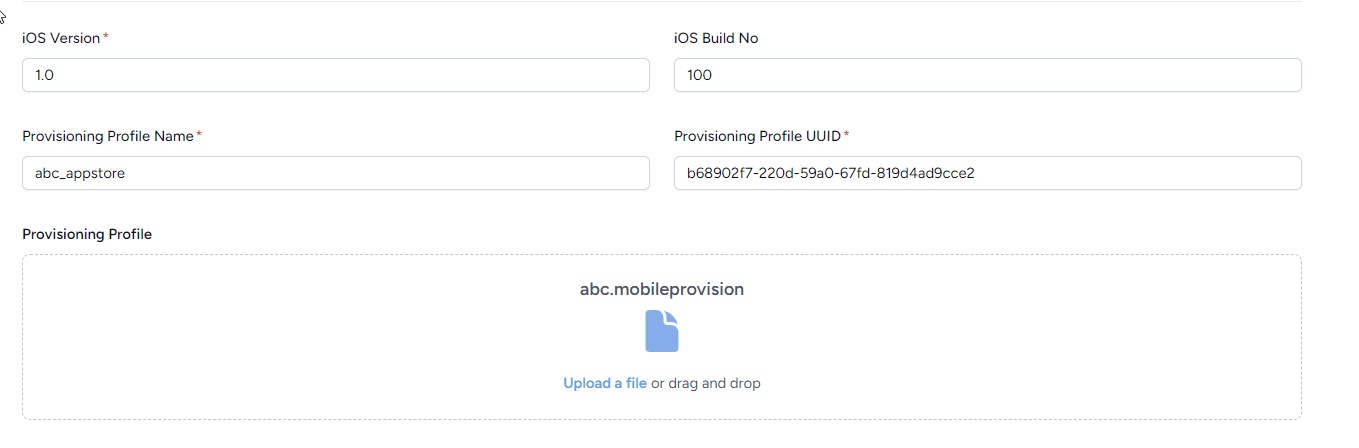
Provisioning Profile Name
This is the name of the provisioning profile you created in your Apple Developer account as described in this help article.
Creating Certificates and Profiles for the App Store
Provisioning Profile UUID
The UUID of the app provisioning profile. To obtain the UUID for the provisioning profile open the Terminal application on your mac and navigate to the directory where you saved your profile. Run the following command
security cms -D -i myprofile.mobileprovision
This will give you a plist xml that you can inspect. Grab the value for the UUID key.
<key>UUID</key>
<string>de2had35-28b7-658f-9c1f-67edfcf4fa3b</string>
Provisioning Profile
The provisioning profile file itself
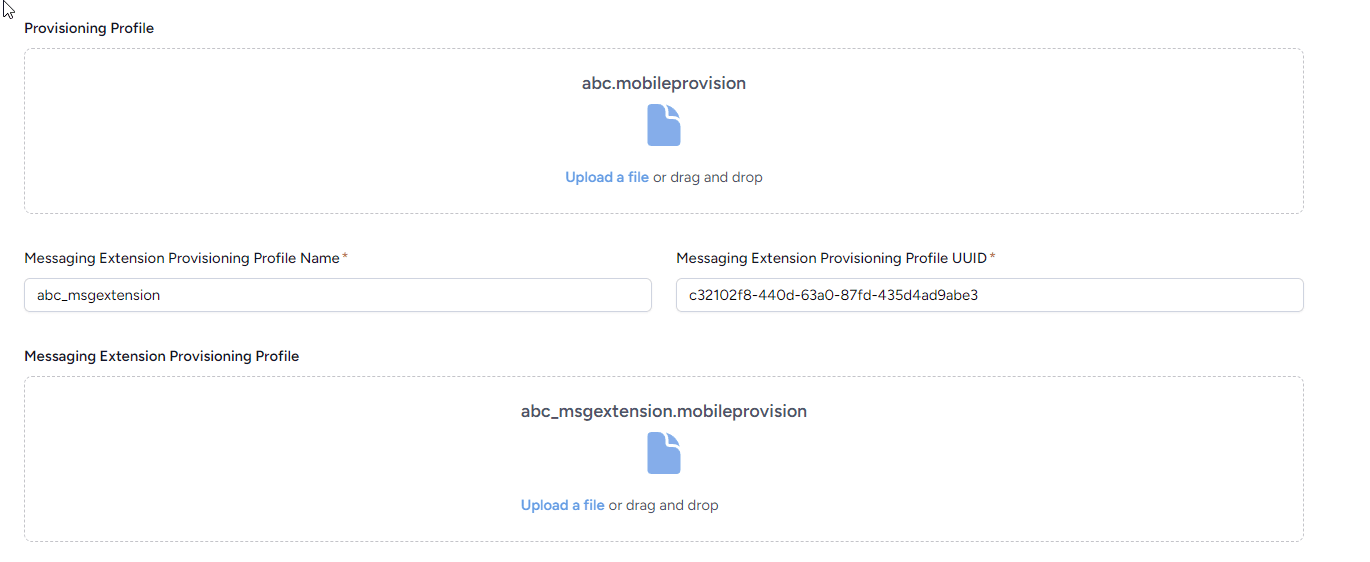
Messaging Extension Provisioning Profile Name
This is the name of the messaging provisioning profile you created in your Apple Developer account as described in this help article.
Creating Certificates and Profiles for the App Store
Messaging Extension Provisioning Profile UUID
The UUID of the messaging provisioning profile.To obtain the UUID for the profile open the Terminal application on your mac and navigate to the directory where you saved your profile. Run the following command
security cms -D -i msgextensionprofile.mobileprovision
This will give you a plist xml that you can inspect. Grab the value for the UUID key.
<key>UUID</key>
<string>de2had35-28b7-658f-9c1f-67edfcf4fa3b</string>
Messaging Extension Provisioning Profile
The messaging extension provisioning profile itself